Key Takeaways:
- Mountaineering boots are rated with a “B-rating” measuring sole stiffness and crampon compatibility – from B0 (hiking boot) to B3 (rigid technical climbing boot)
- Your crampon’s C-rating must match or sit lower than the boot’s B-rating.
- The heel welt is what lets a boot take a step-in crampon, but only B2 and B3 have one
- Most trekkers looking to start mountaineering only need two boots: a B0 hiking boot for trail miles and a B2 for crampon use
Picking the right boot for a high-altitude trek is one of the hardest gear decisions you’ll make leading up to a trip. Honestly, it’s also among the questions we hear most often before a K2 Base Camp departure:
Do I need B1 or B2? Do I really need mountaineering boots? Will my old hiking boots cut it?
They’re fair questions – but the internet doesn’t do much to answer them. Half the articles we’ve read online say a B2 is mandatory if you need to use crampons; the other half say a stiff hiking boot will get you up anything short of a winter climb.
We’ve been running expeditions in the Karakoram, the Andes, the Altai, and the Himalaya for years. We have a strong opinion on this question.
This guide breaks down the B-rating system so anybody can understand it. We’ll cover what B0, B1, B2, and B3 mean, which one fits which kind of trip, and even give you some tips on which boots to buy.
What are Mountaineering Boots?
Firstly, mountaineering boots are different from hiking boots. Hiking boots are built to be comfortable while hiking long distances and to protect your feet from rocky, sandy, and muddy environments.
However, mountaineering boots serve a much more complex series of specific jobs.
- They have to keep your foot stable inside a crampon, meaning the midsole is stiffer (sometimes fully rigid)
- The heel and/or toe often have rubber ledges, called welts, that lock crampons in place (more detail below)
- They must have adequate insulation and stay warm enough at the altitude they’re designed for
- They must take the impact of a kick-step into hard snow without folding
- They must survive a few hundred miles of scree and rock without falling apart, and are hence the upper is more protective, often with a rubber rand wrapping the foot
- They are usually made with much more advanced waterproofing materials to withstand days on end in snow and glacial terrain
The catch is that a “mountaineering boot” covers a huge range. A boot built for a one-day Scottish winter walk technically counts. So does the triple-walled monster you’d wear for the summit on K2. That’s why the universal “B-rating system” exists: to sort that spectrum into something useful, which we’ll break down below.
Can you just wear mountaineering boots in place of hiking boots? No, we wouldn’t recommend wearing mountaineering boots on the approach or for several consecutive days unless necessary. Since they are much more rigid and made from more waterproof materials and are not very breathable, they are usually much less comfortable than hiking boots.

What does the B Stand For?
The “B” just stands for Boot. The matching crampon system uses C, for Crampon.
To start, the B-rating was developed in the UK and is now used worldwide as shorthand for boot stiffness and crampon compatibility. Boots are graded from B0 (a regular hiking boot) up to B3 (a fully rigid technical climbing boot).
The rough breakdown looks like this:
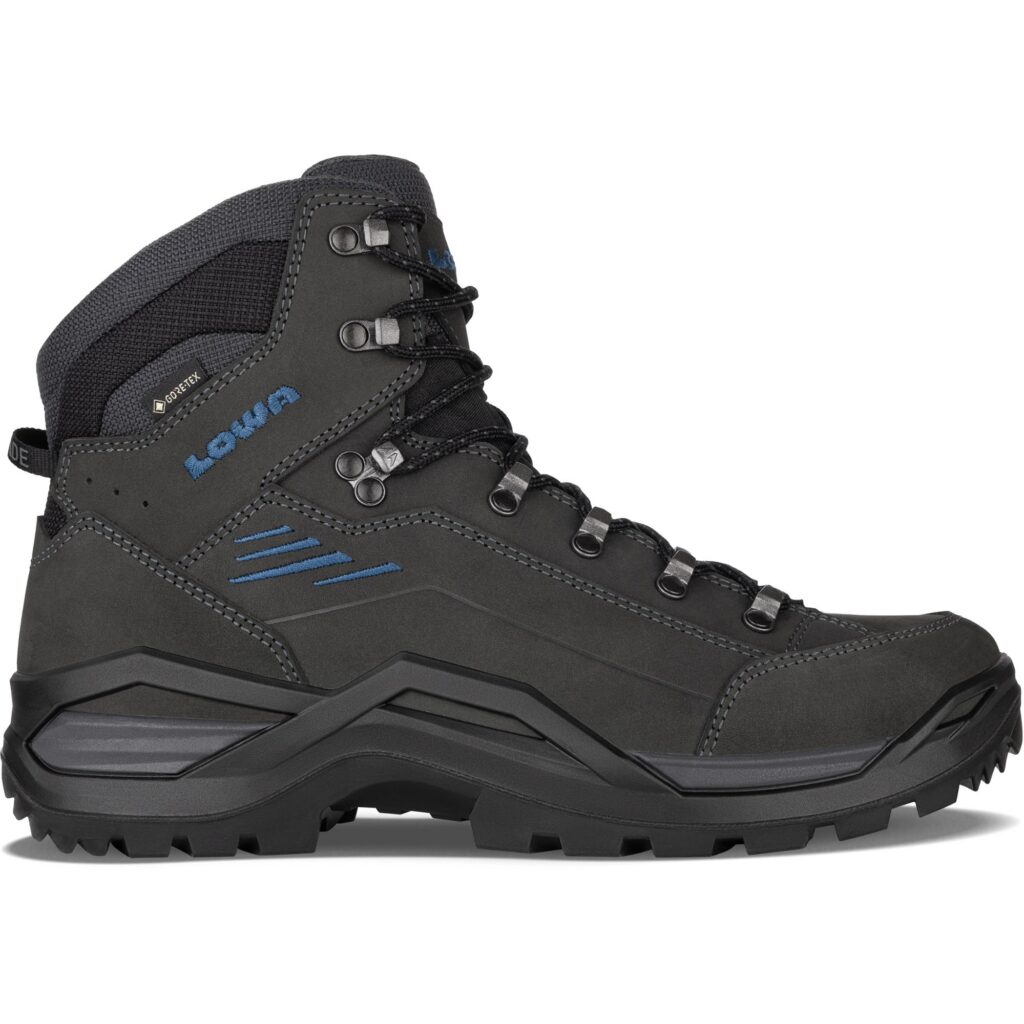
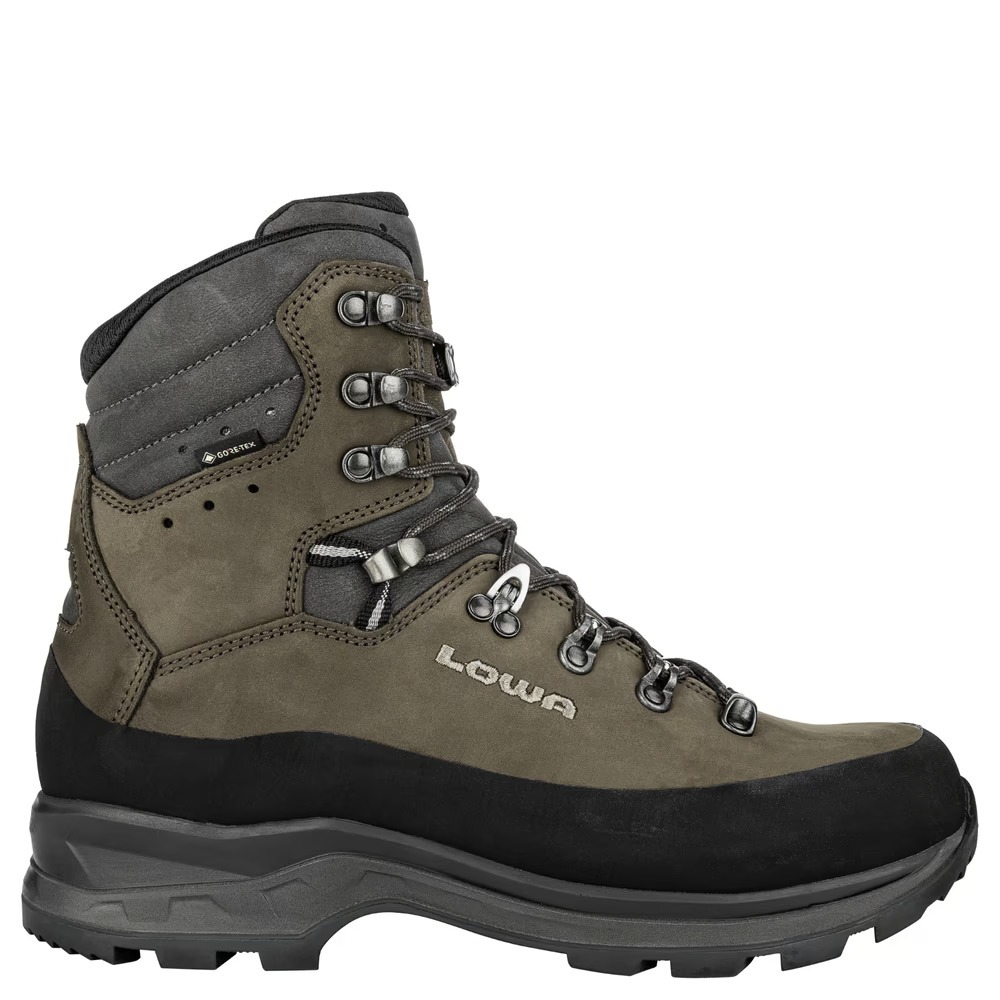
B0 – your standard hiking boot. A flexible sole, no heel welt, typically no insulation. Not compatible with crampons (microspikes are the most you’ll fit). Built for three-season trail hiking on dirt and rock.
Example: LOWA Renegade GTX Mid
B1 – four-season trekking boot. Stiffer than a B0 but still has some flex underfoot. Compatible with C1 strap-on crampons only (no heel welt). Light insulation, usually above the ankle. Built for winter walking, cold-weather treks, and easy glacier travel.
Example: LOWA Tibet Evo GTX
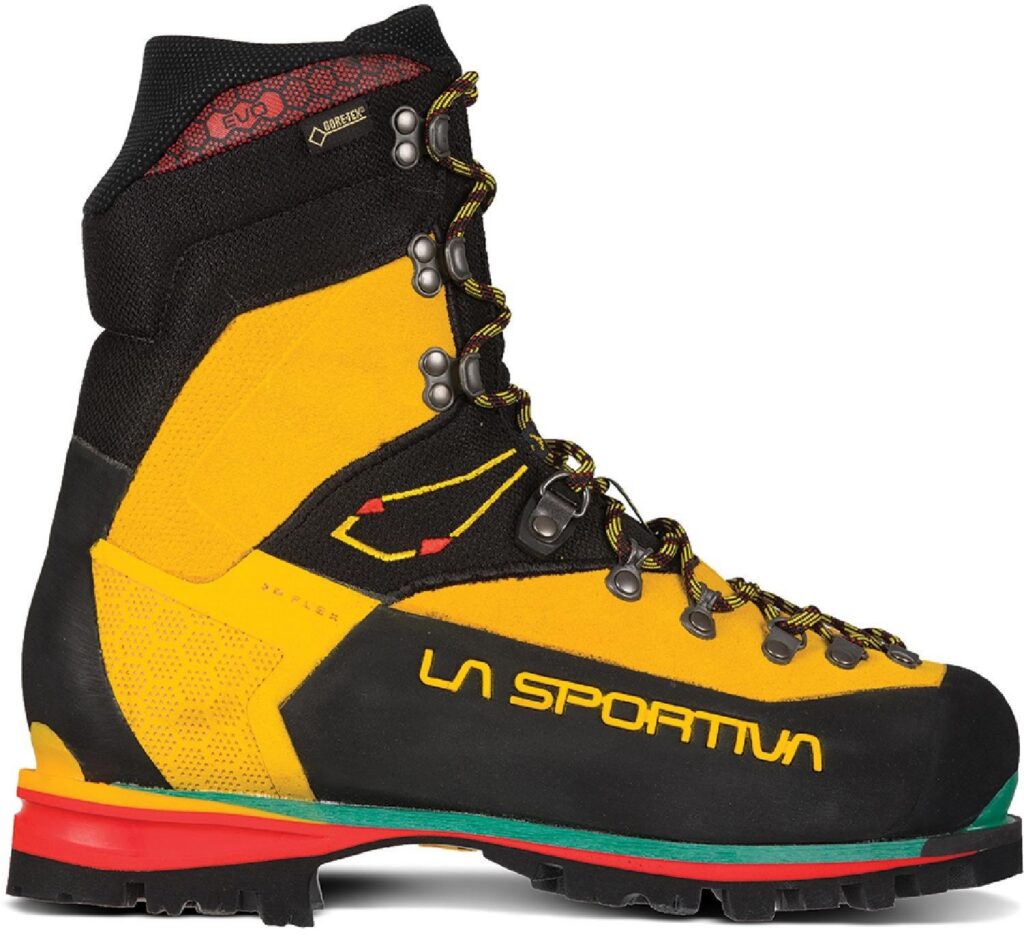
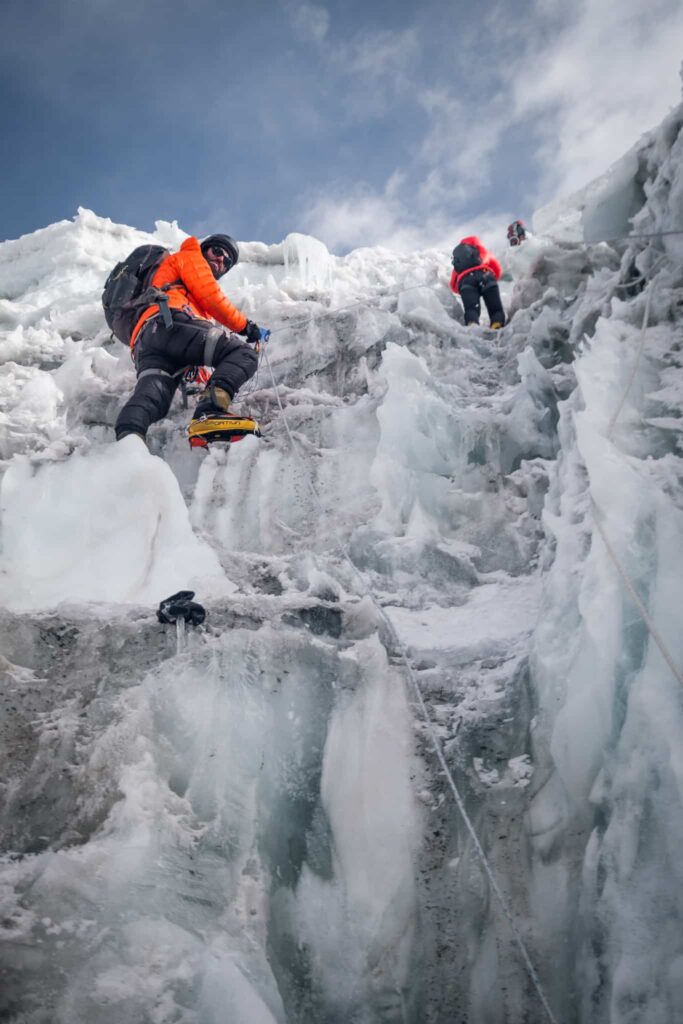
B2 – true mountaineering boot. A stiff sole with minimal flex and a rear heel welt that locks in C2 step-in crampons (it’ll also take a C1). Moderate insulation, often with a protective rubber rand. Built for glaciated passes, mid-grade alpine routes, and alpine passes, like Gondogoro La.
Most true B2s have a heel welt only, though some boots, like the popular La Sportiva Nepal Evo, straddle the line with a toe welt as well for maximum versatility.
Example: La Sportiva Nepal EVO GTX
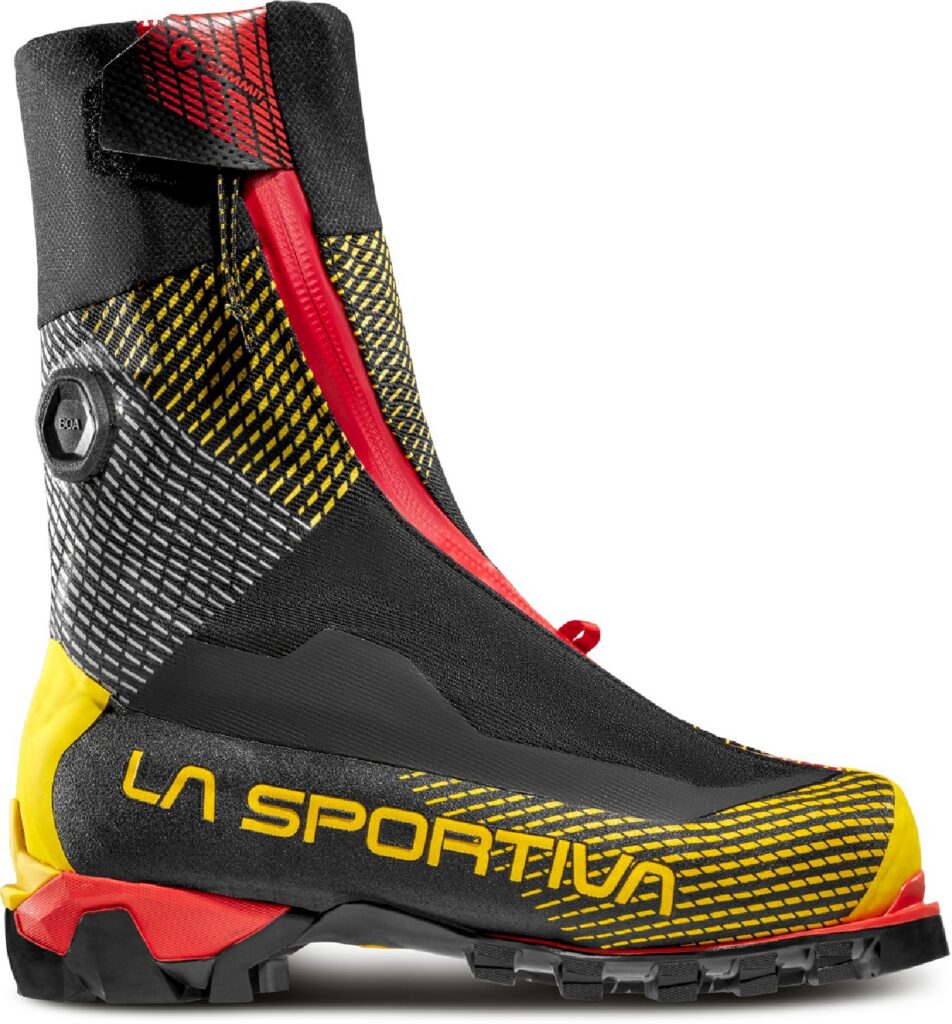
B3 – fully rigid technical boot. A fully rigid sole, no flex at all, plus both a heel welt and a toe lip, which lock in C3 step-in crampons. Heavy insulation, and the high-altitude versions are double or triple-walled. Built for technical ice and mixed climbing, 6,000m+ summits, and expedition mountaineering, with options built up to 8,000 meters+.
Example: La Sportiva G-Summit (one of the lightest mountaineering boots in this category)
What about the C?
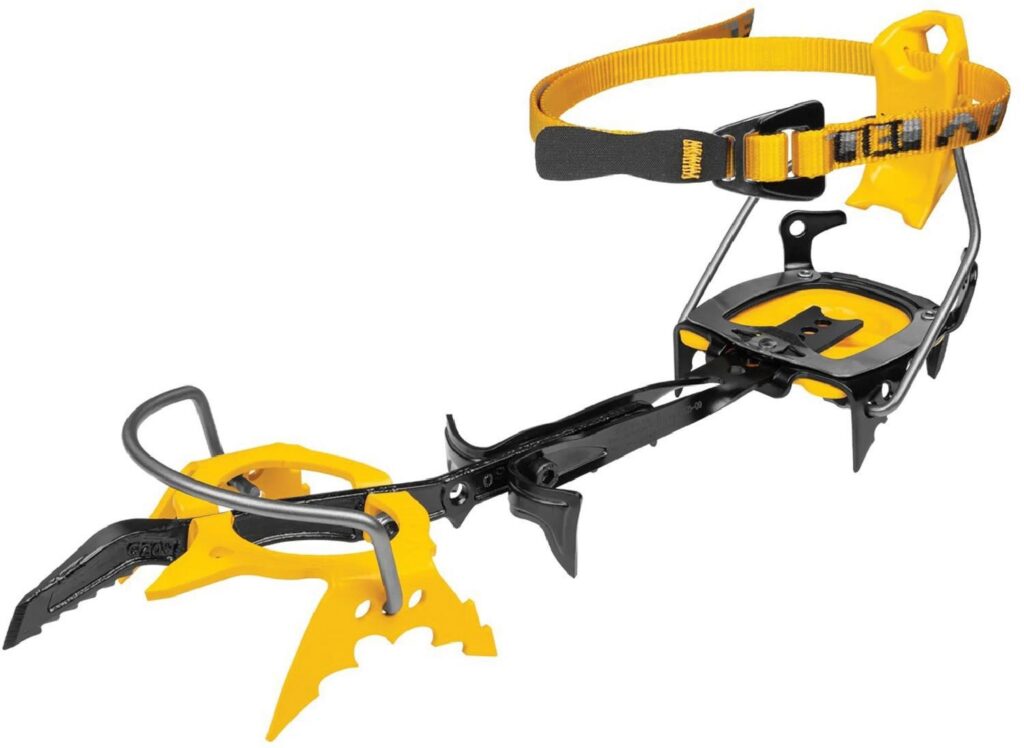
The C in this rating system stands for “Crampon”. Put simply, not all “crampon-compatible boots” work with every type of crampon. The easiest way to apply this simply is that the C rating has to be equal to or lower than the boot’s B-rating.
For example, a C2 won’t safely fit a B1 since there’s no rear welt to lock into, while a C3 needs a B3’s toe lip to clip onto.
Here are the types of crampons broken down:

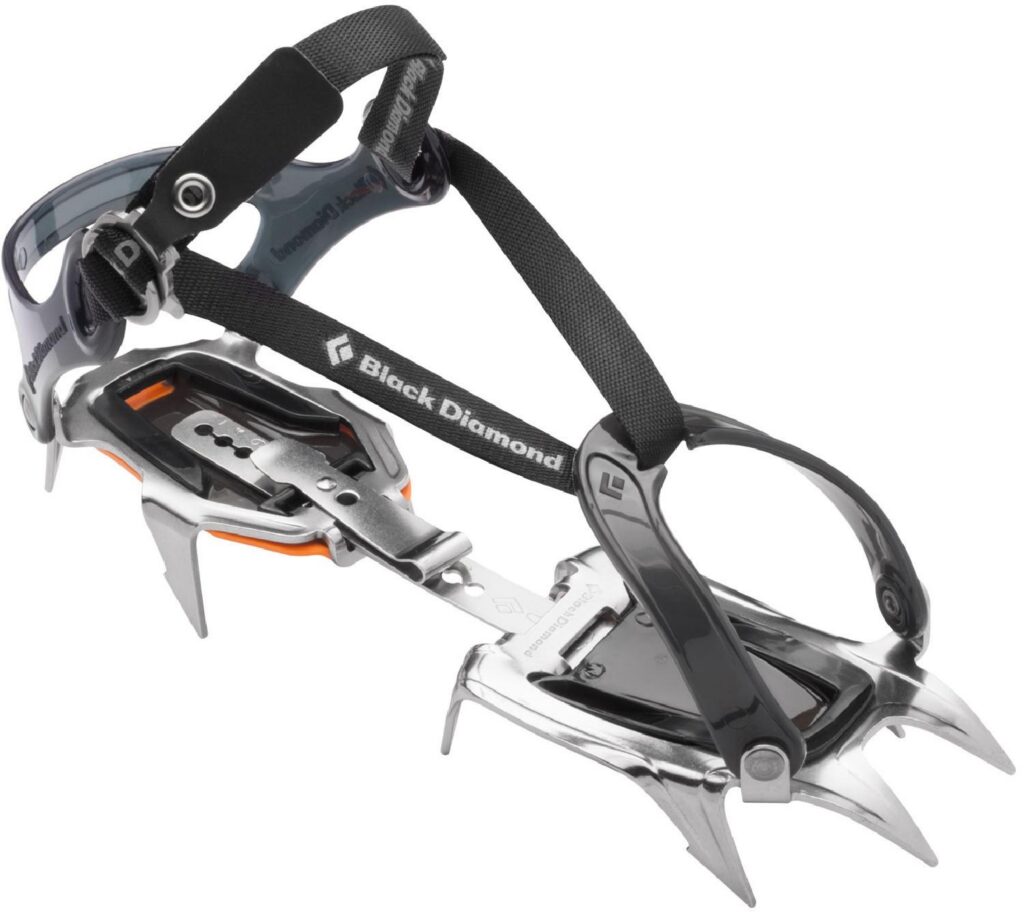
C1 – universal strap-on crampons. A flexible binding that wraps around any boot using nylon straps. Compatible with B1, B2, and B3 boots. Though you probably wouldn’t use them on B3 boots since they are less secure than step-in alternatives (the crampon can shift if the straps loosen).
Example: Black Diamond Contact
C2 – semi-automatic step-in crampons. The rear of these crampons attaches via a heel clip, but the toe still attaches via a plastic cradle in the same way a C1 does. Requires either a B2 or B3 boot with a heel welt. Significantly more secure than C1 and faster to take on and off than C3.
Example: Petzl Sarken (comes with an additional toe clip, which can transform it to a C3)
C3 – fully automatic step-in crampons. The most technical crampon that only works with B3 boots since boots require both a toe lip and a heel welt. These crampons clip in with a heel clip and a toe clip making them the most secure system – used for technical ice and mixed climbing.
Example: Grivel G20
Comparing Mountaineering Boot Types
Now that we’ve broken down exactly what a mountaineering boot’s “B-rating” means, let’s get into the real life adventure use cases. In our experience, choosing between b1 vs b2 vs b3 boots begins by looking at what you’ll be doing on the mountain.

B1 Vs B2 Boots
Recap: A B1 is slightly stiffer than a regular hiking boot, often with better weather protection. A B1 boot does not have a heel welt and therefore can only take strap-on (C1) crampons. A B1 boot is made for cold-weather hiking, light winter use, and trekking with heavy packs over rocky terrain.
A B2 boot is stiffer again, with one critical addition: a B2 boot has a rear heel welt that locks in a step-in (C2) crampon. These boots are built for glaciated passes, mid-grade alpine routes, and any peak that requires a step-in crampon.
Our take: We recommend that most trekkers should skip a B1 boot. A regular old B0 hiking boot covers most approaches and multi-day treks with more comfort, since they’re lighter and more flexible. And as soon as a trip needs a step-in crampon, for example, semi-technical peaks like Island Peak, Lobuche East, or any of the Ecuador volcanoes, then you’ve outgrown the B1 and likely need to purchase a B2 anyway.
This strategy means you don’t need to overlap. Remember, a B0 is great for the approach or several days on the trail, and a B2 is sturdier and a better option overall as a dedicated mountaineering boot.
However, the exception where a B1 would earn its place is for trekkers who specifically prefer a stiffer feel under heavy loads on rocky terrain (some of our team fall into this camp). Or, for a mountain pass like the Gondogoro La crossing on our K2 Base Camp trek, where a B1 will work well for the entire trek and the pass when paired with a strap-on (C1) crampon.
Our recommendation:
- For trail miles, a good hiking boot like the Lowa Renegade GTX Evo
- If you specifically prefer extra stiffness, the Lowa Tibet Evo GTX is the B1 we’d point you to
- For semi-technical peaks and step-in crampons, the La Sportiva Nepal Evo GTX is excellent

B2 vs B3 Boots
Recap: A B2 boot has a stiff sole with some give, a rear heel welt, and takes C1 strap-on or C2 step-in crampons. As we explained above, a B2 boot is specifically useful for glaciated passes, mid-grade alpine routes, and semi-technical peaks where you need crampon security but not full rigidity.
A B3 boot is a fully rigid mountaineering boot with both a heel welt and a toe lip, and takes any crampon up to a fully automatic C3. A B3 boot is built for technical ice and mixed climbing, plus high-altitude expeditions on 6,000m+ peaks where the double-walled (and sometimes even triple-walled) versions add the warmth required at high altitude.
Our take: for most trekkers and newcomers to the mountaineering world looking to build their expedition gear list, a B2 offers plenty.
A B2 covers semi-technical peaks in Nepal like Lobuche East as well as high-altitude volcanoes of South America, glaciated passes, and most mid-grade alpine objectives without the rigidity of a B3. A B3 is the right call only when you’re doing technical climbing (ice or mixed) or going above 6,000m, where a double boot is required for warmth.
This means most Epic clients can stop at the B2. Only those headed up our Spantik climbing expedition or doing serious technical alpine trips need the step up to B3.
However, the exception where a B3 earns its place over a B2 is for trekkers who plan to keep mountaineering and want one boot that does everything. We’re not kidding when we say these boots are expensive – and if you can buy one pair that will handle all technical jobs, it’ll be a B3.
Will a B3 mountaineering boot be overkill on the K2BC Gondogoro La? Yes, but will it do the job? Yes – a single technical B3 like the Nepal Cube can handle every trip a B2 can, plus technical climbing if you ever take it up.
Our recommendation:
- For semi-technical peaks and most alpine work, the La Sportiva Nepal Evo GTX
- For technical climbing or “buy once” versatility, the La Sportiva G-Summit
- For 6,000m+ expedition peaks where a double or triple boot is required, look at the La Sportiva G2 Evo. For anything over 7,000 m you’ll want something like the La Sportiva Olympus Mons cube.
What Type of Mountaineering Boot Do You Need?
With the ratings and crampon system explained, the easiest way to choose a boot is by trip type, ie, what will you actually be doing with them? Below, we cover the three categories most travelers fall into, with the boots we’d recommend for each.
Trekking
Trekking covers any multi-day hike on a defined trail or route, from the Madeira coastline to the Kokoda Track, from the Cordillera Huayhuash to the Hunza Valley. There may be steep climbs, rocky terrain, or the occasional snow patch or long day of hiking in the rain, but a trekking route doesn’t require crampons or technical climbing skills, and therefore you do not need mountaineering boots.
So what about b boots for trekking? – A good waterproof B0 hiking boot is the right choice in almost all regular trekking instances. They’re lighter, more flexible, and more comfortable than a stiffer (B1) boot. And, in the case you want to step it up and tackle an alpine pass or venture into technical mountaineering, they’re typically lighter and easier to pack when you put your B2’s on.
Our recommendation: a sturdy waterproof hiking boot like the Lowa Renegade GTX Evo covers 99% of regular trekking trips.
3-Season Mountaineering
3-season mountaineering covers spring, summer, and autumn objectives where you’re moving on snow, glaciated terrain, or semi-technical alpine routes, but conditions are milder than full winter. Think of trips like Lobuche East in Nepal, the Ecuador volcanoes, or a glaciated peak in the Cordillera Real of Bolivia.
For 3-season mountaineering boots, a B2 is perfect. The heel welt locks in a step-in (C2) crampon, the sole gives you the rigidity to front-point on snow without folding, and the boot is warm enough for cooler nights at altitude without being too heavy or unnecessarily bulky. You don’t need the full rigidity of a B3 because you’re not doing technical ice or mixed climbing, and you’re rarely getting into the deep cold that requires a double boot.
This is also the most common boot category we recommend across the Epic catalog for anything mountaineering-related. The vast majority of our mountaineering trips fall into the 3-season window, which is why a B2 covers so many of our climbs.
Our recommendation: the La Sportiva Nepal Evo GTX is the pick we point most clients toward.
Winter Mountaineering
Winter mountaineering covers technical climbing in deep cold, on hard ice or mixed terrain, or at extreme altitude where temperatures drop well below freezing for days at a time. Think of objectives like winter ascents of alpine peaks, technical ice climbing routes, or any technical 6,000 m+ expedition where double-walled boots are essential.
For winter mountaineering, a B3 is the right boot. In fact, this is what they are built for.
The fully rigid sole gives you the precision to front-point on hard ice, both the heel welt and the toe lip lock in fully automatic (C3) crampons, and the heavier insulation keeps your toes alive in the cold. For the highest-altitude objectives, the boot becomes a double-walled (or even triple-walled) construction, with an inner bootie and an outer shell working together for warmth.
Our recommendation: For technical winter climbing or ice routes, the La Sportiva G-Summit is a versatile B3 that is very lightweight for its category. If you are stepping up in altitude to the 7,000+ meter range, you’ll want to look at the heavy hitters like the La Sportiva Olympus Mons cube.
Tips for Choosing the Right Boot
The B-rating system is your starting point, but choosing the right boot also comes down to a few practical things a spec sheet typically doesn’t cover.
- Match the boot to the trip – It’s easy to get talked into more boot than you need. Start with what you’ll be doing on the mountain. A B2 is overkill for a Mongolian trek; a B0 is dangerous on Lobuche East.
- Try them on in person before you buy – Boots are expensive, and we’ve seen plenty of clients order online and end up with the wrong size. Even within a single brand, fit varies between models. We recommend going to a serious outdoor shop with your full sock system on and trying multiple boots side by side. Once you know your size, you can always save money by ordering online.
- Size up – Most people need to size up about half a size for mountaineering boots. At altitude, your feet swell, you’ll be wearing thicker socks, and you want enough room in the toe box that your toes don’t slam into the front of the boot on long descents.
- Break them in before the trip – just like regular boots, mountaineering boots should have at least 50 miles on your feet before you depart for the expedition. Walk them, hike them, do day trips with elevation gain. Flat-ground miles aren’t the same as climbing miles, and your foot wears the boot in differently depending on the terrain.
- Make sure your crampons match – Remember, a B2 boot only takes the crampons it can lock onto: C1 or C2, not C3. We covered the rules in the C-section above, but it’s worth checking that the specific crampon model fits your specific boot. Oh, and learn how to put on your crampons before you start your trip.
Got any questions regarding mountaineering boots? Reach out to us or drop a comment below, and we’ll point you in the right direction. Otherwise, if you need inspiration for some epic trips to wear your new boots on, check out our Trip calendar!